
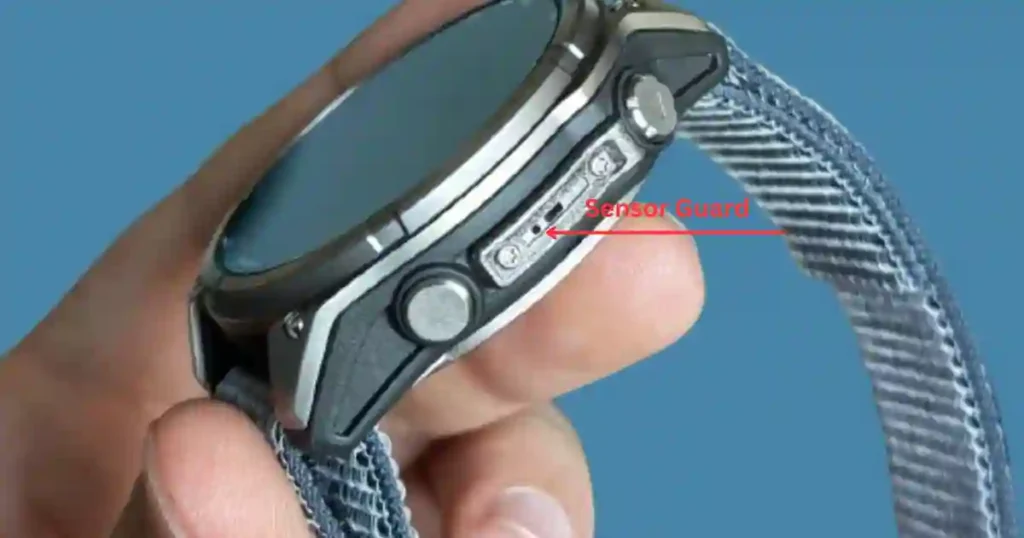
The Garmin Fenix 8 introduces a brand-new sensor guard, which is not only functional but adds a bit of style to this smartwatch.
It is located on the right-hand side of the device, stands between two buttons, and covers some critical components, such as the barometer and newly integrated microphone.
Since its introduction, this bold design element has sparked heated debates among users because of its bright color options and limited configuration choices. Many owners ask whether they can replace it with a unit that suits them better.
In this tutorial, we will be able to show you everything that you need to know about the Fenix 8 sensor guard, from how you can change it to a unique color that really reflects your personality.
What Is the Fenix 8 Sensor Guard?
The sensor guard is a protective cover for sensitive components, such as the barometer and microphone, from potential damage.
Beyond its functionality, Garmin has made it a design feature, offering bold color options like red, black, silver, electric yellow, dark grey, and orange.
While these colors add a splash of style, many users find themselves wishing for more customization options.
Unfortunately, Garmin doesn’t currently allow buyers to mix and match colors. That’s where DIY customization comes in.
Why Customize the Sensor Guard?
Customizing the sensor guard allows you to:
- Express your style with unique colors or designs.
- Stand out from the crowd with a one-of-a-kind look.
- Fix mismatched aesthetics if your sensor guard doesn’t complement your watch band or bezel.
Whether you want subtle elegance or bold creativity, tailoring the sensor guard is how to make your Fenix 8 truly yours.
Can You Change the Fenix 8 Sensor Guard?
47mm and 51mm Models:
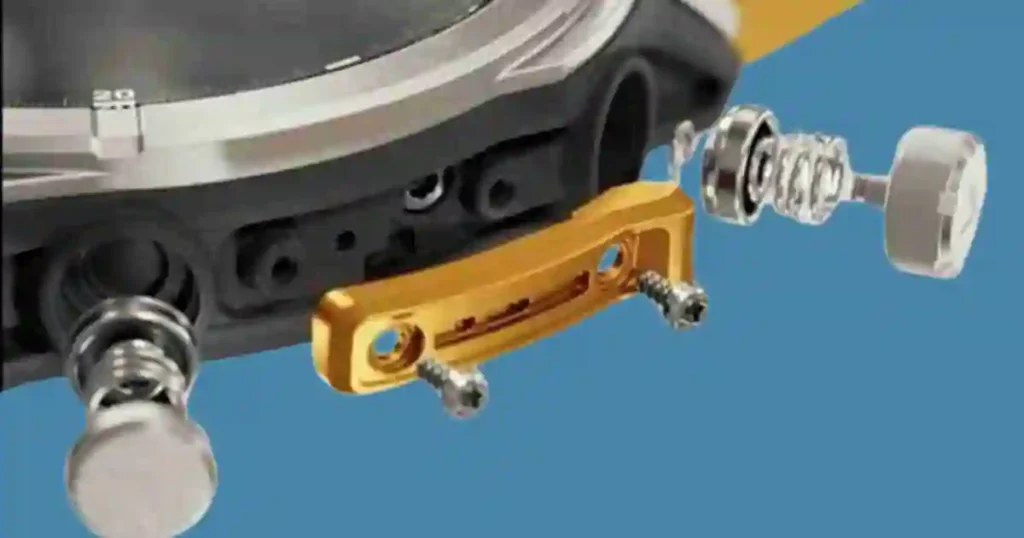
Removing and replacing the sensor guard is relatively quite easy if you have the 47mm or 51mm Fenix 8. Since the guard is screwed onto the watch, you only need a T5 screwdriver.
After removing the screws, you’ll be able to carefully lift the guard off the watch. Now you have a few options:
Paint Job for the Guard: The repaint is one of the easiest forms of customization of your sensor guard. Different owners of Fenix 8 did repaint the sensor guards using spray paint in any color they desired. It’s a process that calls for stripping the existing coating of the guard before applying a new paint.
Wait for third-party 3D-printed or available sensor guards: With increased acceptance of Fenix 8 a few custom-machined or 3D printed sensor guard replacements will hit the market-offering various colored versions to let you add the flair to your new gizmo.
For the 43mm Model
Unfortunately, the more compact 43mm Fenix 8 model presents a bigger challenge when it comes to customization. It has a sensor guard glued to the watch, which is far more difficult to remove without any damage to the device.
That means customization options are rather limited, and attempting to remove the guard could lead to unwanted complications.
Garmin Fenix 8 Sensor Guard Replacement DIY Steps to Customize
One of the most popular DIY options for customizing the Fenix 8 sensor guard is repainting it. This process involves a few simple steps:
Best Tools For Fenix 8 Sensor Guard Replacement
- A T5 screwdriver (for larger models).
- An anodized coating remover (optional for repainting).
- High-quality spray paint or a durable coating.
- Painter’s tape (for masking off areas).
- A soft cloth and a mild cleaner.
How to Replace Garmin Fenix 8 Sensor Guard
Step 1: Remove the Sensor Guard
- Use the T5 screwdriver to carefully unscrew the guard from the watch.
- Set aside the screws in a safe place to avoid losing them.
Note: If you’re using the smaller 43mm model, removal may not be possible without risking damage.
Step 2: Prepare the Guard
- Clean the sensor guard with a soft cloth and mild cleaner to remove dirt or oils.
- If you’re repainting, strip the existing anodized coating using a product like Drano gel mixed with hot water. Follow safety precautions and manufacturer instructions.
Step 3: Customize the Guard
- Apply painter’s tape to mask off areas you don’t want painted.
- Use spray paint or another durable coating to apply your desired color. Hold the spray can 6-8 inches away for even coverage.
- Allow the guard to dry completely before applying additional coats.
Step 4: Reattach the Sensor Guard
- Once the paint is fully dry, reattach the guard to your Fenix 8 using the T5 screwdriver.
- Tighten the screws securely but avoid over-tightening, as this could damage the guard.
Pro Tips for a Perfect Finish
- Choose a paint designed for metal to ensure durability.
- Avoid harsh chemicals or abrasive tools that could damage the guard.
- Test your new design on a small area first to ensure you’re happy with the color and finish.
What About Warranty Concerns?
Before customizing, consider the potential impact on your watch’s warranty. Garmin’s policy states that unauthorized modifications may void your warranty, even for removable parts like the sensor guard.
If warranty coverage is a priority, you might want to explore non-permanent customization options, such as wraps or decals, instead of painting.
Community Inspiration
Fenix 8 users have shared creative designs for Fenix 8 customizations and their sensor guards. Popular forums like Reddit and Garmin user groups are brimming with photos and tips.
Some users have even swapped sensor guards with friends to achieve their desired color combination.
Is Customizing Your Sensor Guard Worth It?
The Fenix 8 sensor guard is a unique and functional feature that adds a touch of personality to the watch. For those who appreciate the customization potential, changing or repainting the guard is a fun way to make your device stand out.
However, it’s important to weigh the risks. The process of removing and modifying the sensor guard could void your warranty, especially if you’re repainting or using third-party parts.
If you’re comfortable with the risks and enjoy DIY projects, changing the sensor guard can be a rewarding experience that adds a personal touch to your Fenix 8.
For those who prefer to stick with the default configuration, the Fenix 8 still offers plenty of style and functionality out of the box.
Final Thoughts –personalized fenix 8 sensor guard ideas
Customizing your Fenix 8 sensor guard is fun and rewarding, making your smartwatch truly personal. Whether you go with a bold new color, a subtle shade, or some sort of creative design, for most models, the process is pretty straightforward and can be done in any number of ways.
However, always weigh the risks of losing your warranty against changes you might make. With a little preparation and some creativity, it’s possible to make an incredibly unique accessory with your Fenix 8 that is truly reflective of your style.
Would you personalize your Fenix 8 sensor guard? Share your ideas in the comments, and subscribe to our newsletter for more information.